Yoga has been proven to reduce stress, anxiety, and depression when practiced regularly. The mindful movements, deep breathing, and meditation of yoga help the body to release tension and rejuvenate. It calms the mind and fills you with new energy. Therefore yoga as a lifestyle as such is already itself a big stress reliever.
However, there are some poses that are especially effective when it comes to reducing stress.
Here are 10 Yoga poses for stress relief.
Easy pose
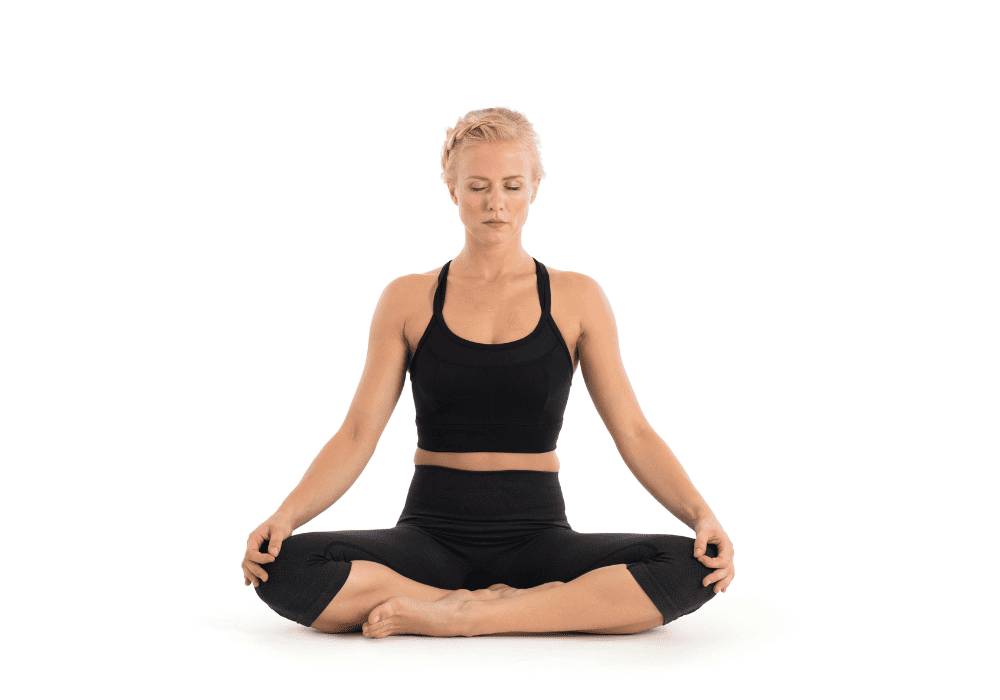
Easy pose or known as Sukhasana in Sanskrit is a basic seated asana. It is a great and comfortable posture that is easy to maintain throughout longer periods of meditation or pranayama.
Benefits of Easy Pose:
- It is a great hip opener
- Stretches the spine
- It encourages a feeling of inner tranquility
- Relieves mental and physical fatigue
How to do Easy Pose:
- Take a seat on your yoga mat, with your legs crossed.
- The crown of your head reaches toward the sky, your spine is long and upright, and your core is engaged.
- Hands can either be in Anjali Mudra in front of your heart or resting on your legs.
- For better results of relieving stress in this pose is to either meditate or practice pranayama or both.
Modifications:
- If you can’t sit in this pose comfortably for a longer period of time, you can sit on a block, bolster, or blanket, to raise your hips higher off the ground. This makes the pose more accessible.
Standing Forward Fold
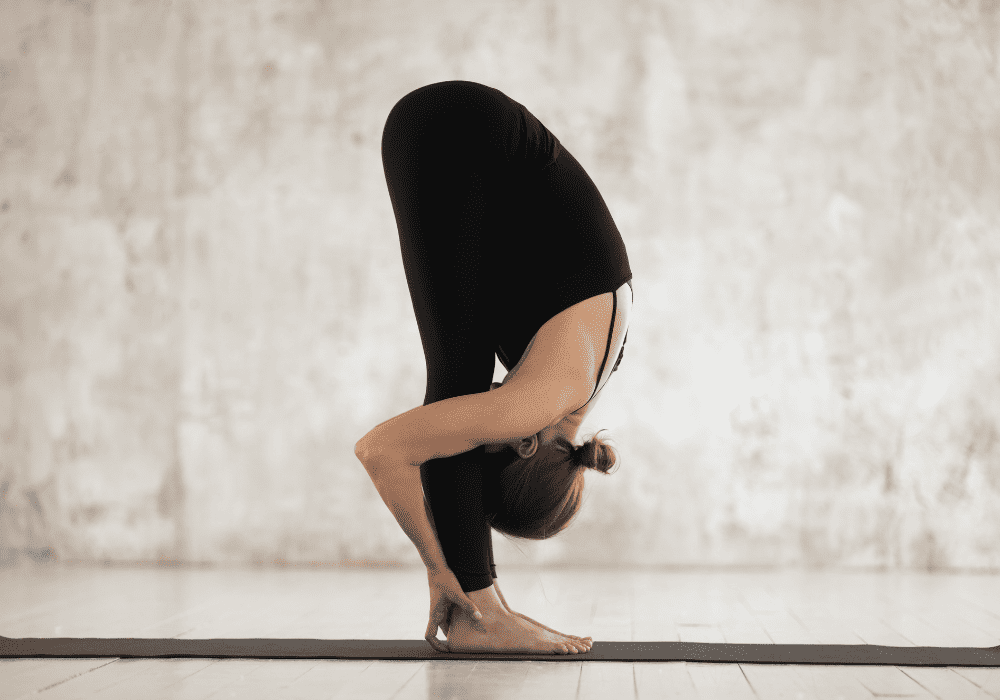
Uttanasana or standing forward fold is an intense stretch for the entire back body. It is a great pose to revitalize your body and mind. This pose can help reduce stress, by giving your brain a rush of fresh oxygenated blood.
Other Benefits of Standing Forward Fold:
- Stretches hips, hamstrings, and calves
- Strengthens thighs
- Keeps your spine flexible
- Calms the mind
- Soothes the nerves
- Relieves tension in the spine and neck
- Eases symptoms of menopause, headaches, and insomnia
- Aids in digestion
- Reduces anxiety and depression
How To Do Standing Forward Fold:
- Begin at the top of your mat in Tadasana.
- Take a deep inhale and raise your arms overhead.
- On your exhale, bend forward by hinging your hips, to lower your hands towards your mat.
- Depending on your level of flexibility either bend your knees or try to keep your legs as straight as possible. However, either way, avoid overextending your knees.
- On each inhale try to lengthen your upper body
- On each exhale try to deep a little deeper.
- Stay in the pose for 8 deep breaths.
- To exit the pose, bring your hands to your hips and use your back muscle strength to lift back into Tadasana.
Note:
- Keep your knees slightly bent.
- Try to avoid rounding the back.
- Relax your neck muscles.
- Engage Mula bandha to deepen the stretch.
- Depending on your level of flexibility modify where necessary.
Modifications:
- Use yoga blocks when you can’t reach the floor with your hands.
- Use a yoga strap to gently pull yourself towards the floor.
- Clasp your hands behind your back and let them fall over your head.
- Grab both elbows with either hand and let yourself hang heavily over your toes.
Intensify:
- Practice Big-Toe-Pose
- Practice Hands-To-Feet Pose
- Stand on your yoga blocks, set the block at the height that suits your flexibility, and then try to touch the floor.
Child’s Pose
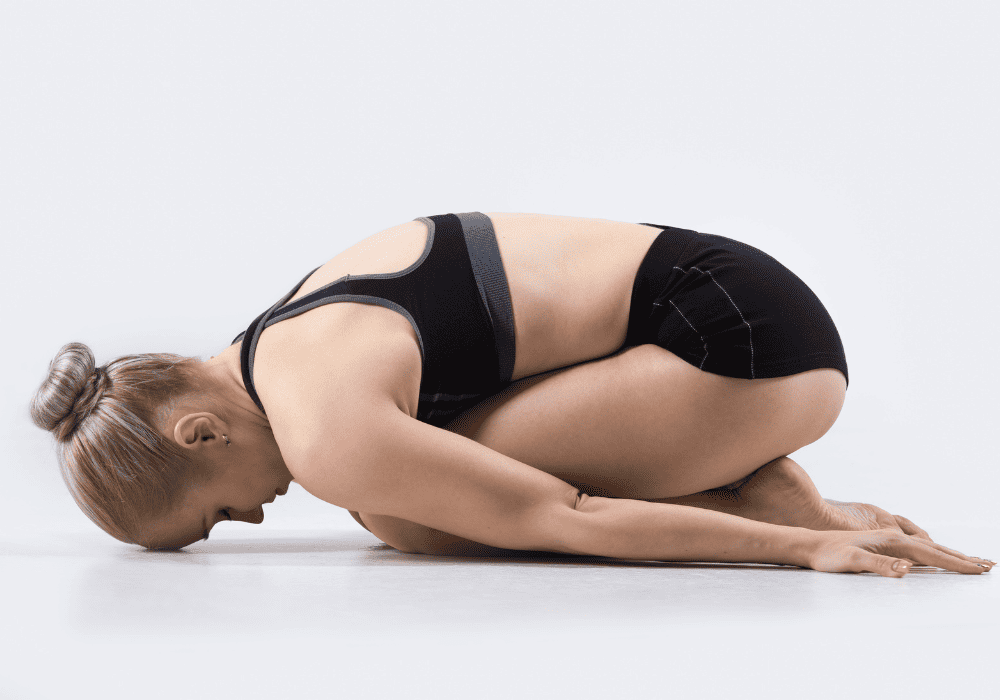
Child’s pose or Balasana is a restorative forward fold that stretches the back body whilst reducing stress and fatigue.
Other Benefits of Child’s Pose:
- Stimulates digestion
- Calms the mind
- Relieves anxiety
- Gently stretches the hips, thighs, spine, and shoulders.
How To Do Child’s Pose:
- Begin in thunderbolt pose
- Take a deep inhale and on your exhale, bend your hips, to rest your forehead on the mat.
- Rest the arms alongside your body with palms facing upward.
- Take deep 5 breaths.
Modifications:
- Use a pillow, block, or your stacked fists to support your head, when you can’t reach the floor.
Variations:
- Extend your arms over your head and rest your hands with palms facing down.
- Spread your knees apart to allow your tummy to rest between your legs.
Legs-up-the-wall-pose
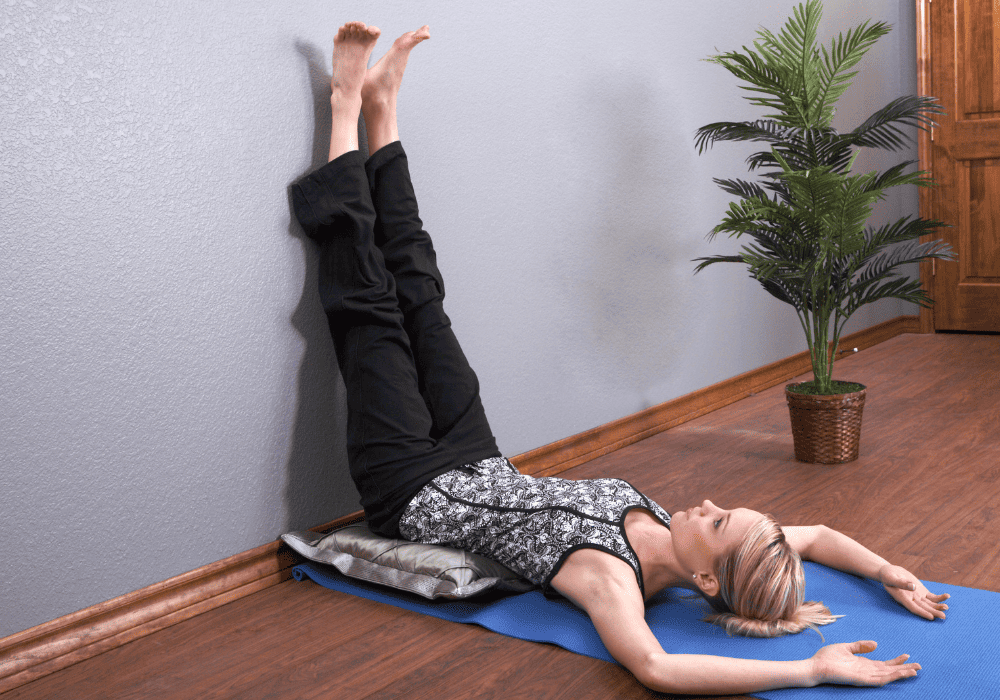
Inversions like legs-up-the-wall pose are also amazing to reduce stress. Viraparita Karani is the Sanskrit term for legs-up-the-wall pose, and is a supported restorative pose that not only refreshes tired legs but is also great to calm the mind and reduce stress.
Other Benefits of Legs-up-the-wall-pose
- Improves lymphatic and venous circulation
- Reduces swelling in your legs
- It activates the parasympathetic nervous system, which helps you relax
- Can help to improve your sleep quality
- Reduces tension headaches
- Relieves lower back pain
How To Do Legs-up-the-wall-pose:
- Sit close to a wall
- Lower your back and head to the floor and lift your legs to touch the wall
- Adjust yourself in such a way that your sit bones touch the wall.
- Breathe and hold the pose
Variations:
If your lower back aches in this position try to modify this pose by resting your calves on a chair.
Cat and Cow pose

Cat and Cow pose are actually two separate poses. Together Marjaryasana-Bitilasana is a great flow to move your spine and calm the mind.
Other Benefits of Cat and Cow Pose:
- Used as a gentle warm-up
- Opens the Anahata Chakra (Heart Chakra) and thus improves self-love, compassion, and kindness.
- Improves blood circulation.
- Reduces tension in the spine
- Sharpens your focus
- Supports emotional balance
How To Do Cat and Cow Flow:
- Begin on your mat from a hands-and-knees position.
- Your knees should be directly under your hips and your hands directly under your shoulder.
- Take a deep inhale and on your exhale round your back, widen your shoulder blades, pull your belly to your spine and gently roll your neck in to come into cat pose.
- On your exhale let your belly sink to the ground and lift your chest and neck to come into cow pose.
- Continue this flow together with your breath for 5-8 rounds.
Modifications:
- If you have an injury to your wrists or your knees, you can practice this spinal movement in a seated position. Either on a chair or in a seated pose, like Easy pose.
- If your body feels like more movement, you can make circular movements between the cat and cow pose or amplify the movement by hinging your hips and knees more.
Bridge pose
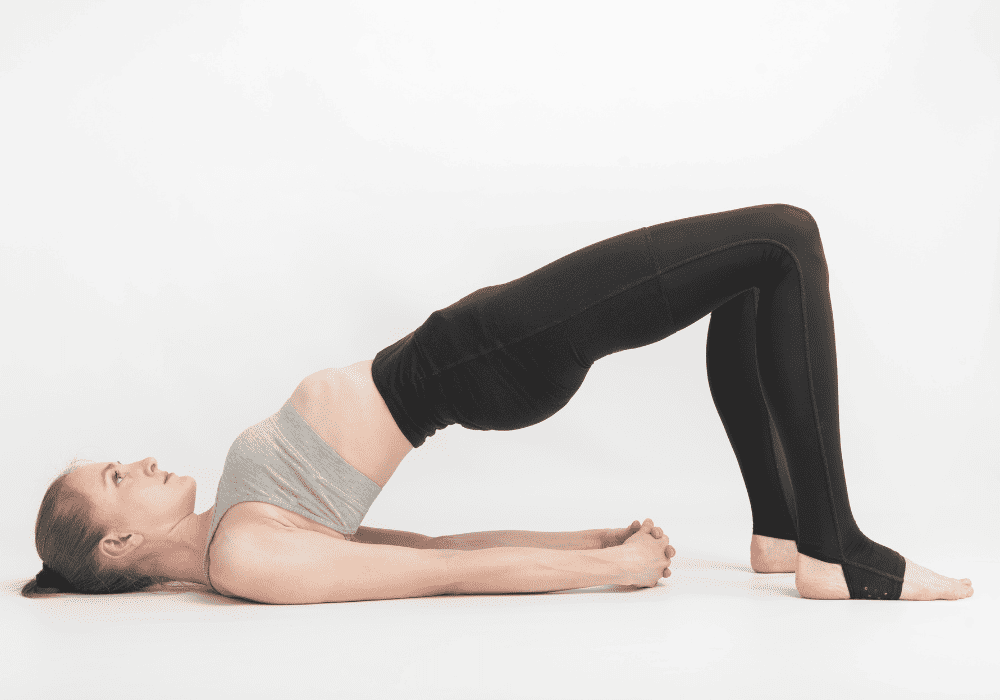
Bridge pose is a backbend or chest opener pose for beginners. It is called setu bandha sarvangasana in sanskrit. Where “setu” means bridge, “bandha” means lock, “sarvanga” means all limbs. Therefore we can say it is the pose where your body needs all your limbs to create a bridge.
Bridge pose is a wonderful pose, because you can use it for whatever you want to achieve. It can be a strengthening pose, an energizing pose, but also a pose to recover and rejuvenate.
Benefits of Bridge Pose:
- Relieves stress
- Stretches the spine
- Expands the lungs and chest, therefore helps to promote lung function
- Improves digestion
- Improves circulation
- Relievs back pain
- Helps to increase quality of sleep
- Rejuvinates
- Energizes
- Strengthens the legs and glutes
How To Do Bridge Pose:
- Begin lying on your back on your yoga mat.
- Bend your knees and place your feet under your knees and keep them hip distance apart.
- Rest your arms alongside your body with your palms facing down.
- On an inhale engage your core, and glutes and activate your Mula bandha whilst lifting your hips off the ground.
- Interlace your fingers and tuck the shoulders under.
- Lift your hips as high as you can.
- Hold for 5-8 deep breath cycles.
Modifications:
- If you can’t interlace your fingers under your back, keep them alongside your body with your palms facing down.
Intensify:
- Once in bridge pose, lift your heels off the floor and push your tailbone up, to deepen the backbend.
Variations:
- For more of a restorative effect, place a block or bolster underneath your sacrum and relax in the pose.
- To make this pose into a strengthening exercise, lift your hips on an exhale and lower your hips on an inhale. You can also intensify the strengthening effect, by keeping one leg lifted and extended.
Caution!
Do not practice this pose when you have an injury to your neck.
Plow pose

Plow Pose or Halasana is an inverted yoga pose that is usually practiced at the end of a yoga class to cool down and wind down. It helps to calm the nervous system and relaxes the body.
Benefits of Plow Pose:
- Stretches the spine, legs, and shoulders
- It activates the heart and throat chakra, in a different way than usual. (Usually, the heart chakra is activated by chest openers.)
- Improves digestion
- Aids in detoxifying the digestive organs
- Regulate practice helps to improve concentration and reduce stress
How to do Plow Pose:
- Lie on your back on your mat with legs extended and arms alongside the body, palms facing down.
- Use your core muscles to lift your hips and legs off the floor, toward the ceiling.
- The torso is perpendicular to the floor.
- Then you can lower your toes slowly to the floor behind your head, legs fully extended.
- Hold this pose for 5-8 deep breath cycles.
Modifications:
- If you can’t reach the floor with your toes, then you can either support them with a bolster, block, chair, or other objects.
- You can also support your lower back with your hands to make this pose easier.
- If you have very tight shoulders you can support them by placing a folded blanket underneath the upper back.
Caution!
- Do not practice plow pose when you suffer from glaucoma or other eye problems
- Avoid this pose when you have a back or neck injury
Shoulder stand

Sarvangasana, the shoulder stand is an inverted posture that helps to bring fresh oxygenated blood to the brain and relax the mind.
Benefits of Shoulder Stand:
- Stimulates the thyroid
- Calms the mind
- Relieves stress
How to do Shoulder Stand:
- Lie with your back on your mat
- On an inhale roll up your legs and hips overhead into plow pose. If your feet don’t reach the floor, place them on a bolster or blocks.
- Press your upper arms firmly into the ground, bend your elbows and place your palms on your lower back for support.
- On your next inhale lift your right leg off the ground, toward the ceiling, followed by your left leg.
- Reach strongly up through your legs and engage your shoulders.
- Take 5-8 deep breath cycles.
- To exit the pose safely, lower one leg after the other, back into plow pose, before taking away your hands and bending your knees into your chest.
- Roll down slowly on your spine.
- End in corpse pose.
Caution!
- Avoid this pose if you have a back, shoulder, or neck injury
- Do not practice this pose if you have high blood pressure
- Avoid if you have an enlarged thyroid
- Do not practice shoulder stand when you have glaucoma or other eye problems.
Corpse Pose

Corpse pose is the universal resting pose in yoga and is also known as savasana. It is used as the final resting pose after every yoga practice.
Benefits of Corpse Pose:
- Relaxes the body and the mind
- Releases the build-up of lactic acid.
- Recharges the body
- Allows the mind to go inward
- Reduces stress
How to do Corpse Pose:
- Lie on your back
- Bring your feet wide and allow your knees to fall to the side
- Place your arms as wide as your yoga mat, with your palms facing upward, and your fingers relaxed.
- Close your eyes and relax every part of your body.
- Breathe deeply and then just “be” in the pose.
Note!
Pregnant women, should either elevate their back or rather relax in Fetal pose (Parsva garbhasana)
Final Thoughts
In our daily lives, we have a lot of stress factors. Stress can present itself in various ways. Some might experience anxiety, some may suffer from neck pain or migraine. Whatever causes stress in your life, in whichever way, give these 9 yoga poses for stress relief a try.
You will be surprised by how efficient these poses are and how much better you will feel after your yoga practice. Try to make yoga a daily habit in your life for optimal results.
Enjoy your practice.
And remember;
“It is not the load that breaks you down. It is the way you carry it.” – Lou Holtz
Namaste
FAQ’s
How do yoga poses relieve stress?
Yoga poses can help relieve stress by calming the mind, relaxing the body, releasing tension and toxins from your muscles and body, and bringing awareness to your breath.
Which yoga is best for anxiety and depression?
Yin Yoga, Restorative Yoga, and Gentle Hatha Flows are all great types of yoga if you want to relieve stress, anxiety, and depression.